Connections and Flags
The Radius
Section titled “The Radius”The Radius of a node is indicated by a blue polygon that goes out in all directions from the position of a node. The photo below was taken from above – we are looking down onto a node, and you can see the colour of a Radius is Blue.
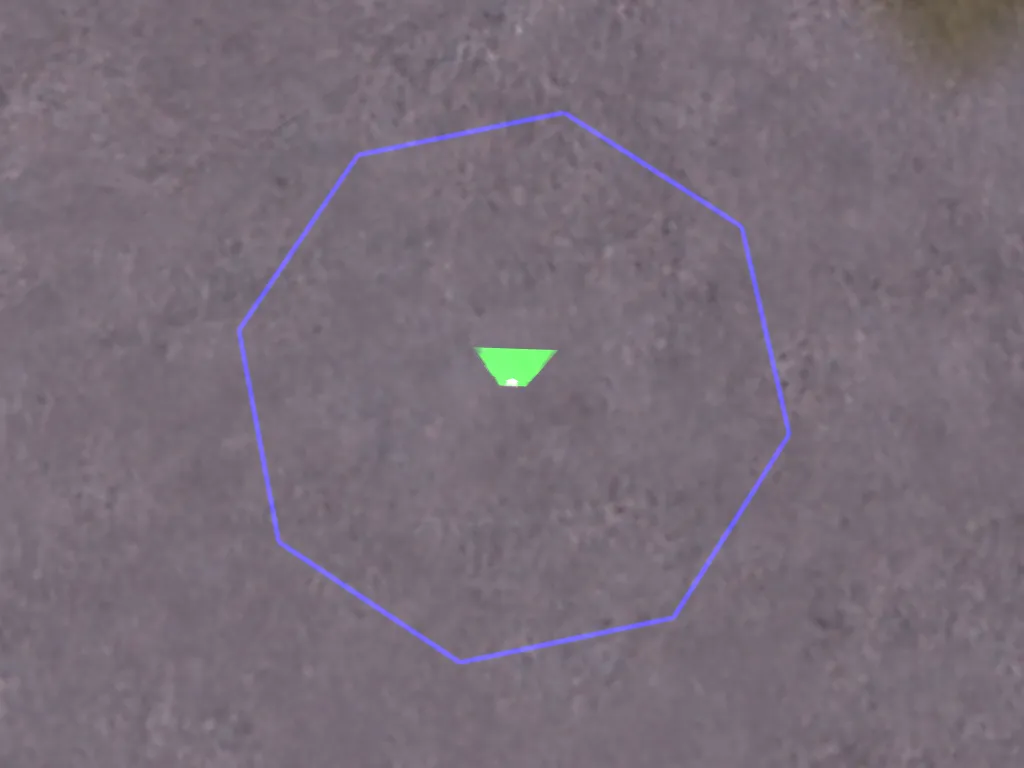
The Radius indicator is a great means to see how big the radius of a node actually is; it ends exactly where the corners end.
What does the Radius actually do? It tells the bots how exactly they must navigate around the node in question. If a bot walks past a row of nodes with big radius, it will know that super-exact navigation is not required. If the radius is small, the bot will stick strictly to the nodes.
Thus, in open areas, big radius help to make bot navigation natural – you wouldn’t want to see a bot run across a wide courtyard as if it was following an incredibly thin, straight line painted onto the ground, would you? It looks much more natural if the bot takes advantage of the space it has around it.
However, in narrow corridors and doorways or on bridges, the situation is different: too big a radius would make bots too careless, they would bump into walls or even fall off a bridge because they think they can walk anywhere inside that big radius!
That’s why choosing appropriate node radius is so important. As a general rule, keep the radius big in open areas and make them small in narrow passages.
Setting or Changing the Radius
Section titled “Setting or Changing the Radius”The good news first: You don’t have to set every single Radius manually, the editor will do much of the work for you! It will automatically calculate the Radius of a node depending on the area around it. If the editor detects higher (~more than knee-high) obstacles like walls nearby, it will automatically adjust the Radius to reach up to the wall, not further. However, the maximum Radius is limited to 128 units. This means that even on a totally open plain, where the nearest obstacle is hundreds of distance units away, the Radius will not exceed 128.
Now you might wonder “Well, if the editor does all this for me, why would I change radius by hand?” The answer is simple: the editor helps, but it isn’t perfect, it cannot detect all kinds of obstacles (I can’t go too much into detail here because all this is pretty much map-related). Anyway, you will see places where the radius cuts into an obstacle – it could be a very thin pillar, a fence, or even a solid-looking car that’s parked in the streets. Another problem is not with walls, but with holes and cliffs: If there is no high obstacle, the editor will regard an area as clear and set a big radius, it doesn’t care if right next to the node there’s a yawning abyss where bots will fall to death!
So these are areas where you will have to keep a watchful eye on your radius and if necessary, change them by hand. In narrow corridors and especially around narrow doorways, you will see that even a small radius calculated by the editor doesn’t make the bots navigate precisely enough. In such places, it’s strongly recommended lowering the radius to zero.
In order to change the radius of a node, bring up the graph editor and select 8. Set Radius. The following menu will appear:
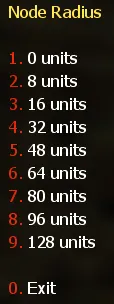
Simply select an option by pressing the corresponding key, and the radius of the currently active node will be changed to the selected value. You will quickly get a feeling for these numbers if you play around with them a bit.
Nodes with Fixed Radius
Section titled “Nodes with Fixed Radius”Connecting Nodes
Section titled “Connecting Nodes”Nodes alone aren’t sufficient to make bots move the way you want. They must be connected with other nodes in order to let bots reach their goal. By default, connections up to a certain distance will be made automatically.
You can select the automatic connection distance (AutoPath Max Distance, APMD) by bringing up the graph editor and selecting “7. Set Autopath Distance”. The following sub-menu will appear:
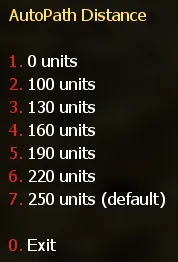
Select the desired distance from this menu. After selecting a distance, connections up to that distance will be drawn automatically. Of course, you can also add and remove connections manually.
Two-Way (Bidirectional) Connections
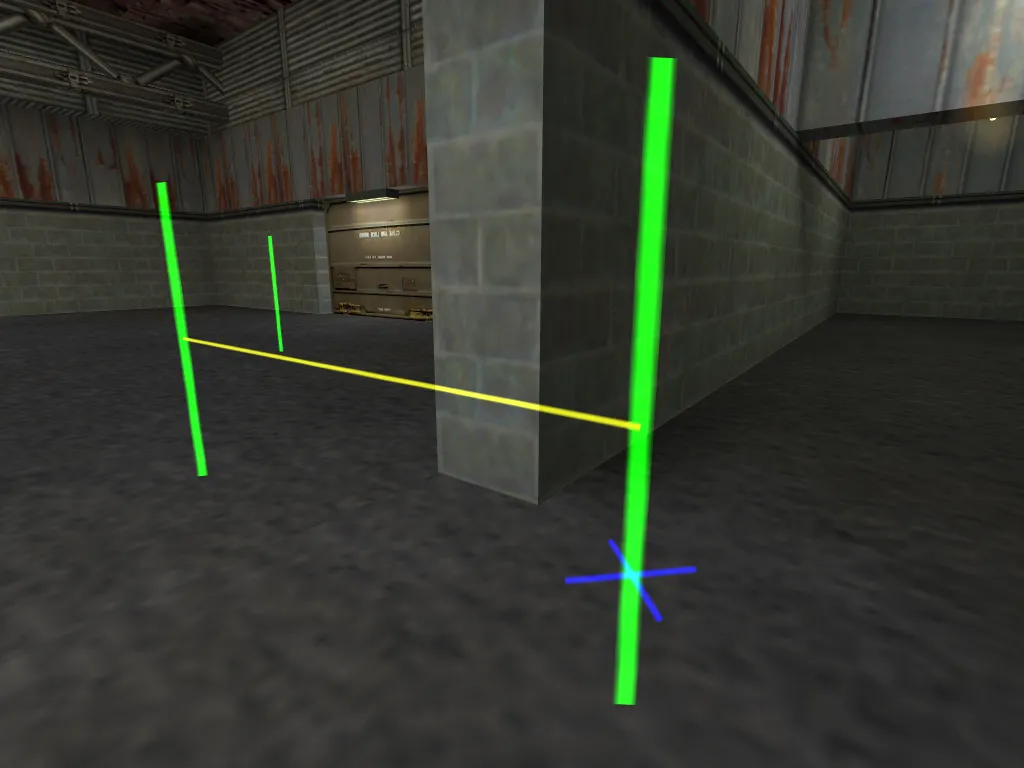
Section titled “Two-Way (Bidirectional) Connections”The vast majority of all connections in a node set will be bidirectional. Obviously, these connections enable bots to walk both from point A to point B and back from point B to point A. The colour of bidirectional paths is yellow, as you can see in the picture below.
One-Way Connections
Section titled “One-Way Connections”One-way connections enable bots to walk from point A to point B, but not vice versa. They can be useful to make bots drop down a wall or a high crate, but prevent them from attempting to get up. Of course, there may be more places at which a 1-way connection can make sense, but that depends on the map.
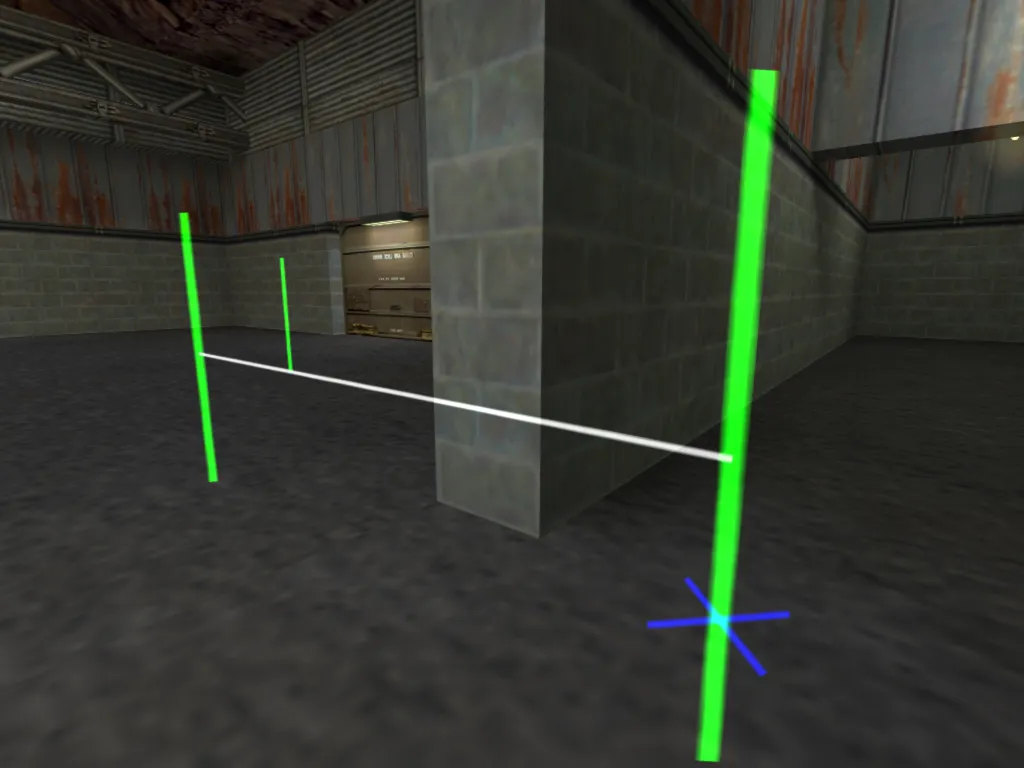
In game, 1-way connections will be visible from 2 nodes, their start and their end node. In order to show you the direction of 1-way connection, it will be shown in different colours depending on from which perspective you view it. Let’s say you have a 1-way connection from node 1 to node 2. In this case, when you are standing at node 1, you will see the outgoing 1-way connection displayed in white.
The picture below shows the same two nodes with the incoming connection (from left to right node). The incoming 1-way connection is displayed in teal.
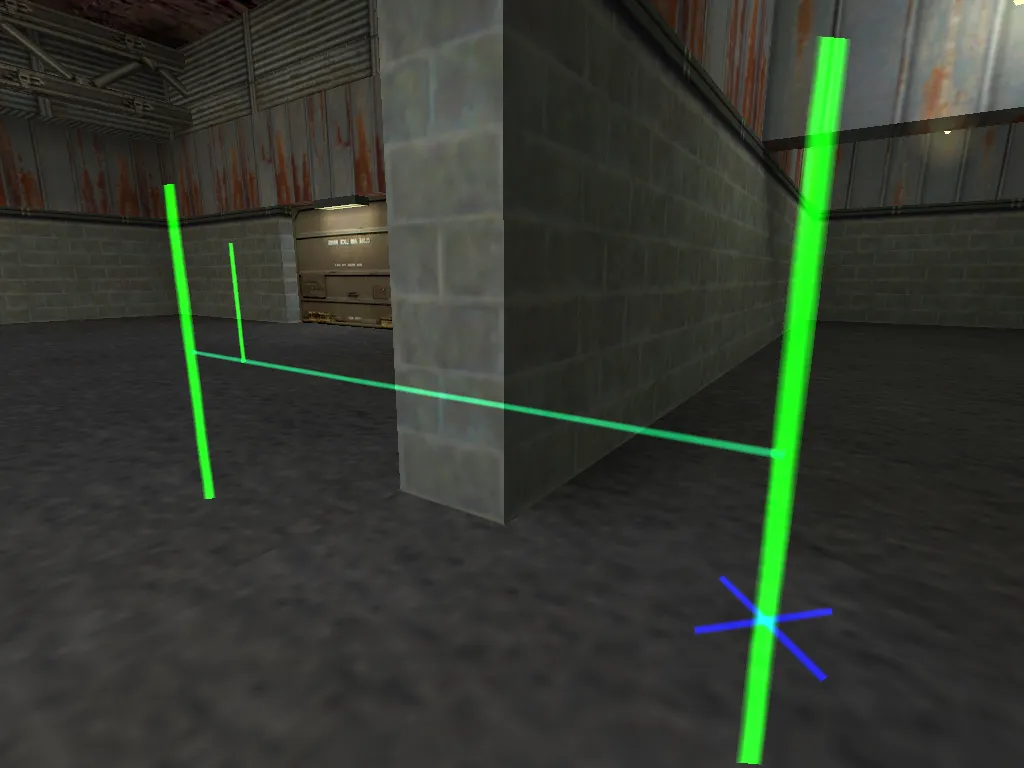
The fact that 1-way connections are shown from both involved nodes is a great feature. It makes spotting errors very easy and saves you the trouble of running around to check if there is a connection TO the node where you are standing.
Jump Connections
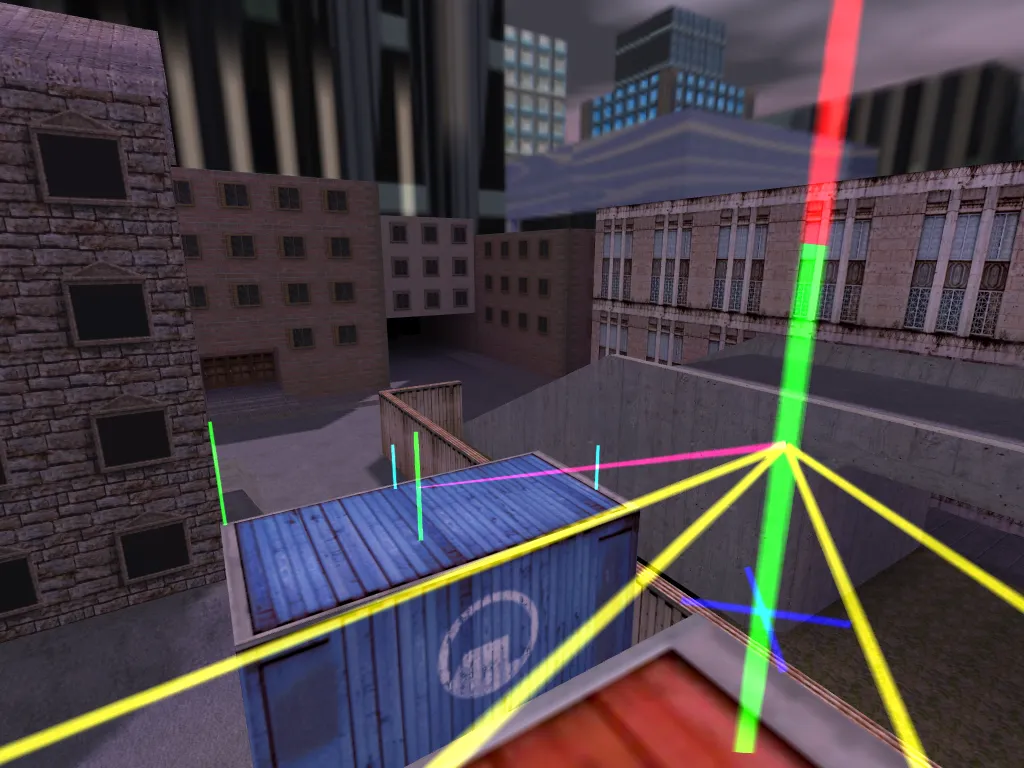
Section titled “Jump Connections”Jump connections are a bit special as they cannot be drawn like any other connection. But that’s not all, apart from that, Jump connections can also be one-way or two-way connections. To make matters even more complex, their 2-way version can come in two flavours: A “pure” two-way jump connection, i.e. a Jump connection from A to B and another Jump connection back from B to A or a “mixed” two way connection, with a Jump connection leading from A to B and a regular one-way connection back from B to A. The latter version will be very rare, though.
Now once again, this sounds more complicated than it actually is. The Jump connection horizontal line is displayed in red (Outgoing Jump connection), viewed from the nodes where the bots will start their jump.
Adding/Removing Connections Manually
Section titled “Adding/Removing Connections Manually”Now you know the most important things about connections in general and the different types of connections. You also know how to adjust automatic connection lengths and how to add a jump connection by hand. But how do you add or remove a connection by hand?
You simply aim at the desired node and select the action to perform from the on-screen menu!
Here’s how it works. Let’s pretend we wanted to delete the connection from the node where we’re standing to the left node near the wall – aim at the node with your crosshair. As soon as the node is selected, it will become bigger, and a little arrow will appear in front of it.
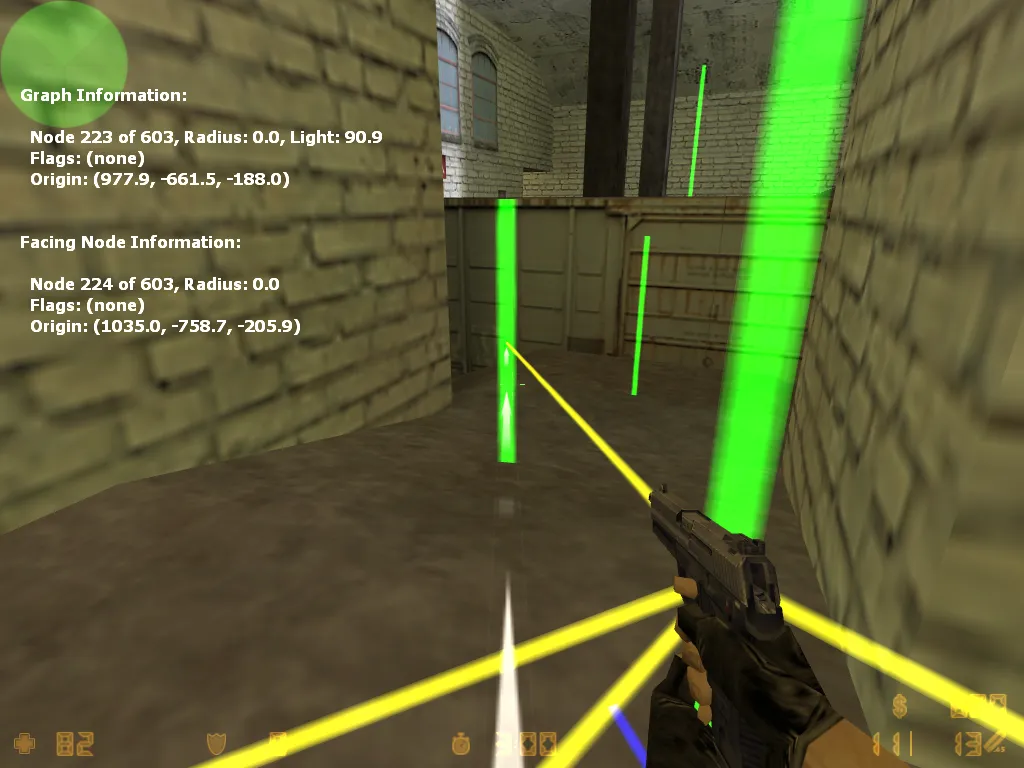
Removing Path Connections
Section titled “Removing Path Connections”To delete a path connection, you must open the graph editor and select 4. Delete path.
After deleting the path connection, you may notice that the outgoing path connection has been removed (from the node where you are standing to the node you selected) as you can see in the picture below:
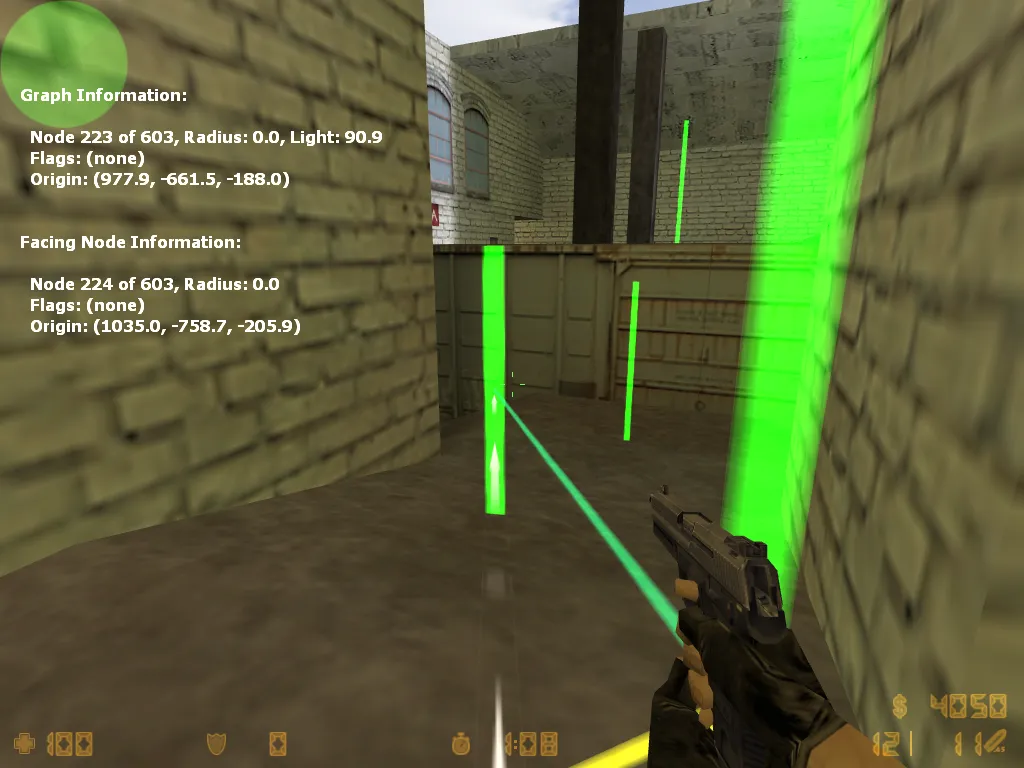
Select 4. Delete path again to delete the incoming path connection.
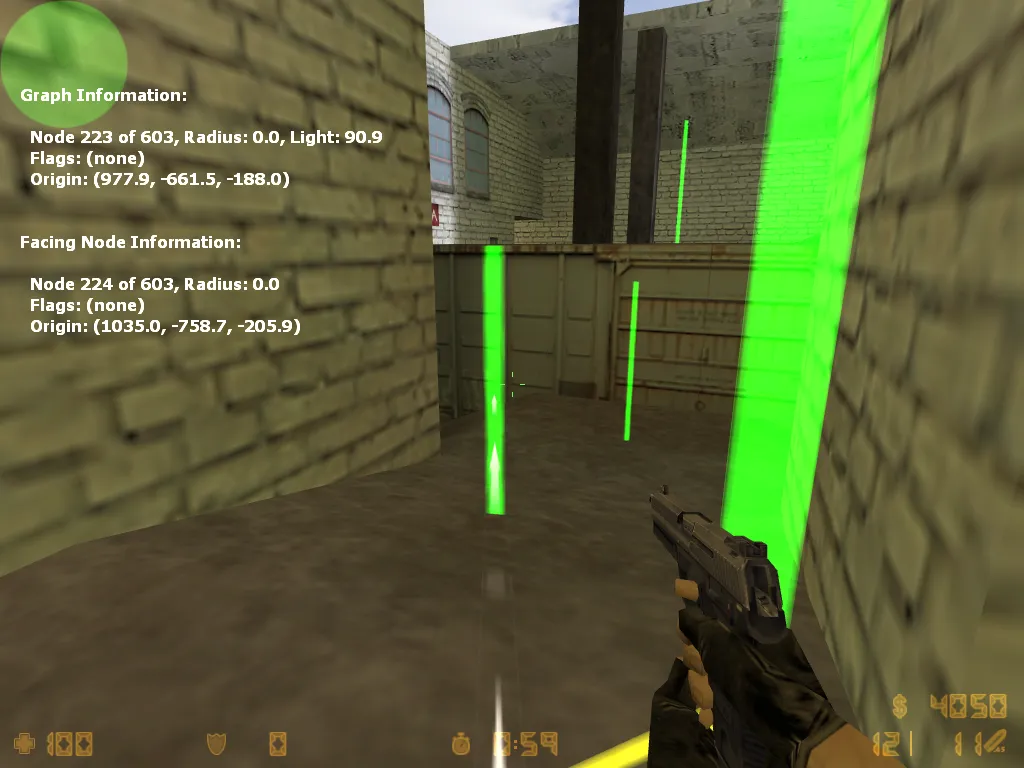
As you have already noticed, all path connections have been removed from the node you are standing on to the selected node.
Adding Path Connections
Section titled “Adding Path Connections”To add a path connection, you must open the graph editor and select 3. Create path. Then a menu should appear as shown in the picture below.
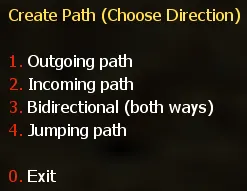
- Select 1. Outgoing Path to create an outgoing path connection from nearest to faced (or cached) node
- Select 2. Incoming Path to create an incoming path connection from faced (or cached) to nearest node
- Select 3. Bidirectional (Both Ways) to create a bi-directional (2-way) path connection between the nearest and faced (or cached) node
- Select 4. Jumping Path to create an outgoing jumping path from nearest to faced (or cached) node
Node Flags
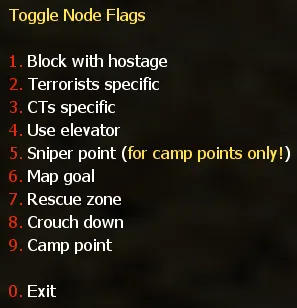
Section titled “Node Flags”YaPB has 9 flags for nodes, which are:
| # | Flag | Description |
|---|---|---|
| 1 | Block with Hostage | A flag that prohibits Counter-Terrorists leading hostages from going along certain nodes marked with this flag. Important: you should definitely put these flags on the ways where counter-terrorists can lose hostages! |
| 2 | Terrorist Specific | Makes node important for Terrorists |
| 3 | CTs Specific | Makes node important for Counter-Terrorists |
| 4 | Use Elevator | A flag for a node that makes bots wait while they uplift on the elevator (you must put this flag on the node at the beginning and at the end of the elevator path) |
| 5 | Sniper Point | A flag that makes the camp point as a sniper point (bots will only camp with sniper rifles) |
| 6 | Map Goal | A flag that turns a normal node into a goal node |
| 7 | Rescue Zone | A flag that specifies the node as a hostage rescue point |
| 8 | Crouch Down | A flag that causes bots to crouch when reaching this node |
| 9 | Camp Point | A flag that makes the node as a camp point. If you add this flag, it opens the menu to choose the start and end direction of the bot’s view when it’s camping |